Part 4 of a 6 part series
In this tutorial I thought I would share some of the things I have learned about using point and shoot cameras for fly photos.
Auto Mode
For many point and shoot users the entire idea of just "pointing and shooting" is very appealing. It's easy and the results are quite reasonable and generally "good enough". All you do is set the camera in its "Auto" mode and fire away.
But there is a problem with this mode: you must give up control over many available features that will improve your photographs. To get the most out of your camera, especially for close up fly photos, you will want to use as many of the following features as you can:
Macro
Single point or spot focusing
Flash off
Center weighted metering
EV Compensation
ISO adjustments
White balance adjustments
Image Stabilization
Beyond Auto Mode
Only the more advanced point and shoot cameras have all of these extra features. But even the simplest cameras have most of these features. For example, my Canon G9 and Panasonic LX5, both flagship models, have all of these features plus full separate manual controls for shutter speed and aperture. On the other end of the spectrum, my "idiot proof" Panasonic waterproof TS2 camera has all but the center-weighted metering option... and for this camera there is a work-around that involves using the EV Compensation button instead.
To activate these additional features, most cameras have what is called a "P" mode (which stands usually for Programmed) or an "M" mode (which stands for Manual). My waterproof Panasonic identifies this mode as "Normal Picture". The "M" mode appears on my wife's SD-series Canon and I also remember it on my old Fuji F20. This "M" should not be confused with full manual control, often marked "M" as well, available on the most advanced cameras to allow manually and separately controlling aperture and shutter speed.
After you make the leap to "P", "M", "Normal Picture" or a similar setting, you'll need to use the camera's menu or one or more of the camera's buttons to make the following adjustments:
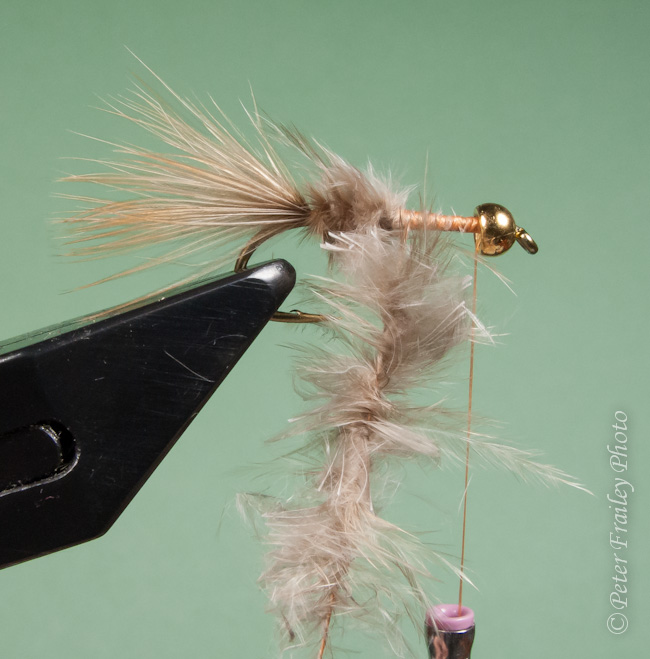
MACRO: Look for the tulip icon. On every camera in my family, there is a button on the camera body that is assigned to this feature. The macro will allow you to focus as close to the subject as the lens is designed for. Most macro settings work best at full wide angle. Unfortunately, this often means the lens must be 1" or less from the subject, particularly for a small fly. This is crazy. Though the camera will focus, the camera blocks the light. Experiment with your particular camera. Try to find a spot in the zoom range where the fly is sufficiently large in the viewfinder but which also gives you at least 2" of working room between the fly and the lens. This is pretty easy to do if you are photographing, say, a size 4 classic streamer. It's more difficult if your subject is a size 18 Griffith Gnat. For this reason, if you plan to photograph a size 18 or smaller fly, you might want to tie one on a size 12 hook.
SPOT FOCUSING: In auto mode, many cameras have no choice but to focus on multiple points in the scene. But for close ups you will want 1-point or spot focusing. The focusing point is usually a small set of brackets or box shown on the LCD. Obviously, you will want the single focusing point to be aimed at the fly and not the background. On some advance cameras, like my Canon G9 or Panasonic LX5, this spot focus point can be moved around the screen. I like to line it up with the hook point. If the hook point looks sharp in the picture, the human eye and mind seems to accept that the entire fly is sharply in focus.
FLASH: Turn it off
CENTER WEIGHTED METERING: This option may not be available on your camera. But if it is, I would suggest using center-weighted metering. This causes the camera to weight the light on the central subject more heavily than the light on the background when it comes to determining the "correct" exposure.
EV COMPENSATION or PLUS MINUS EXPOSURE: This option is viewed as a pretty advanced function, but all the Panasonics and Canons in our family have it. It is usually shown as a button on the back of the camera and the icon is a "+/-". It allows you to manually change the exposure. My experience is that the camera accomplishes this by changing the shutter speed. So, even if you don't have the center-weighted metering option described in the paragraph above, you can make an exposure adjustment to your next image by using the +/- feature. If your fly appears too dark, move the +/- scale to 1 stop on the plus side of the scale and take the picture again. The "+" means that you are adding light. If it is still too dark, move it 2 stops on the plus side. This feature is especially helpful if you have a darker fly against a lighter background. If you are shooting a light colored fly, then you might move the scale in the "-" direction to reduce the exposure.
ISO:
WHITE BALANCE: Colors look different under different light. Ever notice how pictures taken indoors are yellowish? A white wall might look yellow, when the lighting is from incandescent light bulbs. And a flash may make things look bluish. White balance adjustments are available to help colors look more accurate under different lighting. Auto white balance is the default setting in all cameras. In most daylight situations the auto white balance does a good job. But indoors, it struggles. At the very least, scroll through the various white balance settings and pick one that yields colors as close as possible to how they look to your eye. The white balance choice that looks like a light bulb is often good. Even better, if available, is a custom white balance. Usually, with custom white balance, you point the camera at something that is supposed to be white or grey. The camera can then make a calibration adjustment, for example so that a white wall looks white and not yellow.
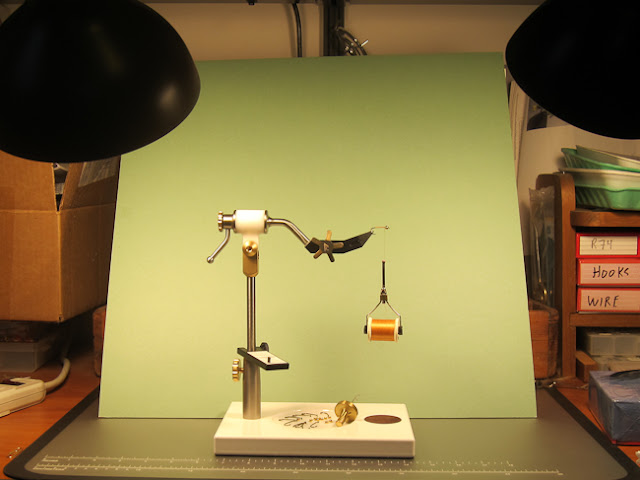 |
Auto White Balance on my Canon S90. The colors are way off.
The fly vise base should be white. |
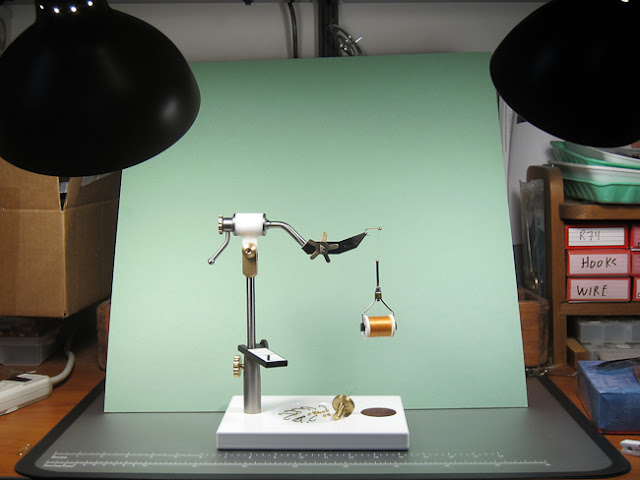 |
Custom White Balance. I set the custom white balance by having the camera
calibrate white off the base of the vise. It got it right.
|
IMAGE STABILIZATION: Turn it off. If your camera has image stabilization, this is great when hand-holding a camera in dim light. But if using a tripod, images may actually be sharper if you turn off image stabilization.
Beyond P Mode
If you have one of the few point and shoot cameras that has full manual controls, then you have the added benefit of being able to control depth of field. Depth of field relates to how much of the fly is in focus. A shallow depth of field means only a small "slice" of the fly is in focus. With a larger depth of field a thicker "slice" of the fly is in focus.
APERTURE PRIORITY: To increase your depth of field, switch to "Aperture Priority" mode. This is usually done via a dial on top of the camera. The dial will often show these choices: Auto, P, A, S, M. Pick "A" to get to aperture priority. First try shooting with the aperture set to F4. This is often the sharpest setting. But also try F8. This gives more depth of field, though overall it may be less sharp than F4. On the other hand, with more of the fly in focus, the image may appear sharper with the F8 setting.
Conclusion
I know there are a lot of suggestions here. And if you have been taking all your pictures in Auto mode, these suggestion may be a bit over the top.
What do I think are the most important features? I like having aperture priority on my cameras, but cameras with this feature are very few in number. I think knowing how to use the macro mode is important. Though this seems obvious, I know many people forget to use it and learn to live with blurry images. A third important feature is white balance. If you take pictures indoors under artificial light, you will need to know how to adjust your white balance if you want colors to be accurate.
It's my wish that at least one of the advanced features described in this post will work itself into your picture-taking routine.