Part 5 of a 6 part series
So..., using the information and suggestions from the first four parts of this series on photographing your fly tying steps, I have prepared a few images showing the construction of a very simple yet effective fly I call the "One Feather Fly". It is a great pattern for practicing dubbing, both direct dubbing and dubbing loops. And it involves using feathers that don't often get much respect, these being rump feathers from upland game birds such a pheasants and quails.
This fly has a very similar construction to the Conehead Combo, which uses turkey maraboo. Step-by-step instructions for the Combo can be found my Website here: http://www.fishingwithflies.com/MyFavoriteFliesTheConeheadCombo.htm
The picture below is how I set things up tonight for tying the One Feather Fly. The purpose of the large white foam board (left over from a picture framing project) is to reflect light upward and underneath the fly.
[Edit: The white foam board was an experiment, and I'm not sure it made enough difference to bother with it... and after tying a few flies I think I had spots in front of my eyes because it was too bright for me looking down at an angle as I tied the fly.]
Many people place a third or even fourth light under the fly to match the light from the two lamps above the fly. But, its hard enough to tie a fly with the front of the camera lens only 2" away from fly, so I don't bother with lights below.

One thing I forgot to mention in the prior posts is that the camera's built-in self timer is very helpful. If I am holding any materials, the timer allows me to press the shutter button and quickly position materials, which I did in several of the pictures below. By default, most cameras will give you a 10 second interval.
 |
| Here are the ingredients: hooks, beadheads, and one pheasant rumpfeather with aftershaft for each fly. Cut the main feathers in half. Do not cut the smaller aftershaft feather.  |
Tying Steps
 |
| Tie in the tip of the front half of the pheasant rump feather. |
 |
| Twist the feather into a rope and wrap forward like chenille on a woolly bugger. |
 |
| Tie off the rope about 2/3 of the way up the body or when the stem gets too thick to wrap. Snip off the excess. |
 |
| Create a dubbing loop into which you will insert the back half of the feather. |
 |
| I use a dyna-king dubbing spinner. |
 |
| Stick the back half of the feather into the loop. To make it more dense you can fold the feather in half (which is a standard technique I find difficult) or insert two feather halves (as I did here) |
 |
| Cut off the stem. |
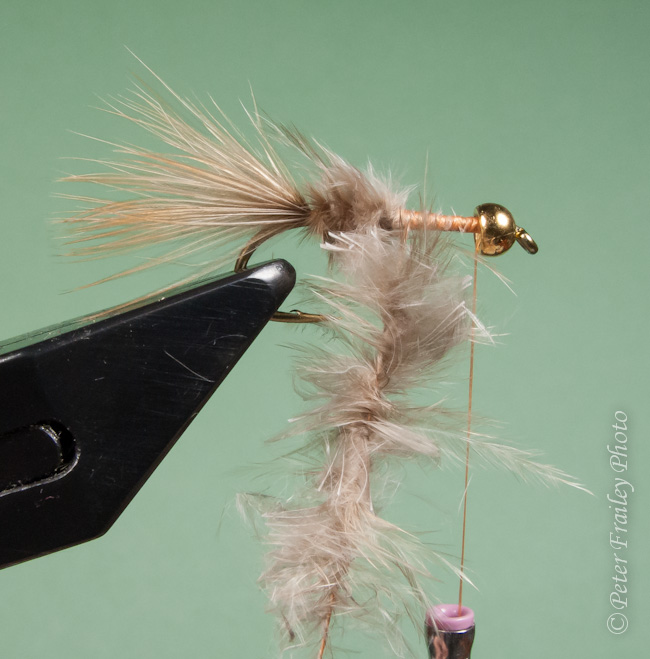 |
| Spin the thread with the dubbing spinner. |
 |
| Wrap the dubbing loop forward and tie off. There will likely be some additional hook shank to cover. |
 |
| Resort to direct dubbing to finish the front of the fly. Aim the butt of the stem of the soft aftershaft feather toward the beadhead and twist the feather onto the thread just like you'd do with rabbit dubbing. |
 |
| Wrap the dubbing forward while helping it with the fingers of your left hand. |
 |
| Stroke the fibers rearward as you wrap the dubbing behind the beadhead. |
 |
| Finish by tying off behind the bead head with a few whip knots. I cheat by using a whipping tool. |


