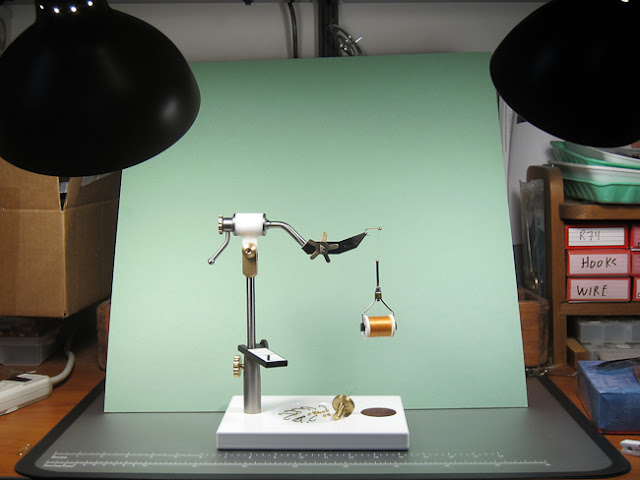
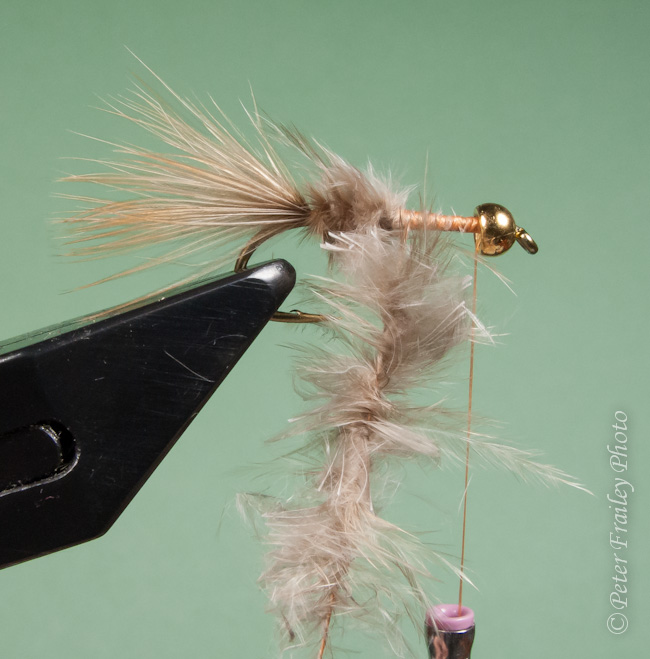
Showing posts with label fly tying photography tutorial. Show all posts

Friday, February 28, 2014

Set up for photographing the finished fly (Part 6 of 6)

Part 6 of a 6 part series

My friend Eric emailed me last week to let me know he was getting set for a fly fishing trip to Alaska and wanted to photograph his flies.  I thought I'd link him  to the tutorials I'd written here, but then realized I had stopped at part 5 of 6.

So... I have just finished Part 6 of 6.

[To read the first five parts of this series, click on "fly tying photography" in the list of keywords in the left side margin... or, you can use this link:

Below, as an alternative to photographing a finished fly in the vise, I show two other techniques for holding the fly in place.  I like the E-Z Hackle Pliers (about $3 at Cabelas) because the fly can be held just a few inches above a flat surface making it easier to bounce light up and under the fly.


So, here is what I did to prepare the fly

1) Place a big piece of white poster board on my desk
2) Place the fly in the E-Z pliers and stand it up
3) Find something to use as a background.  Here I have used a green folder.
4) Angle two desk lamps so that they aim toward the fly but are also aimed down to bounce light off the white poster board
5) Find a book thick enough on which to place the camera (or use a desk top tripod)


Here's how I to set up the camera assuming you have no manual controls for F-stop or shutter speed.

1) Set custom white balance.  You usually need a white piece of paper to aim the camera at.  The white poster board does the trick!
2) Set the camera to macro
3) Turn off the flash
4) Set the 10 second timer
5) Place the camera on the book
6) Half press the shutter to focus the camera
7) Press the shutter fully to activate the timer


Here's another idea.  I put the fly into a small Leatherman pocket tool.  It stands up nicely.  But in this case I did not use a book to support the camera, nor did I use a tripod.  Instead I braced my forearms against the front of the desk.  If you try this, don't forget to use the self-timer.  I used the 2 second timer.  This prevents the shake that comes from pressing the shutter button.


Use two hands. I'm holding with one hand here, because my right
hand is taking the picture using a second camera.
Note my forearm is resting on the edge of the desk.


Sunday, April 29, 2012

Step-by-steps for the "One Feather Fly"

Part 5 of a 6 part series

So..., using the information and suggestions from the first four parts of this series on photographing your fly tying steps, I have prepared a few images showing the construction of a very simple yet effective fly I call the "One Feather Fly".  It is a great pattern for practicing dubbing, both direct dubbing and dubbing loops.  And it involves using feathers that don't often get much respect, these being rump feathers from upland game birds such a pheasants and quails.

This fly has a very similar construction to the Conehead Combo, which uses turkey maraboo.  Step-by-step instructions for the Combo can be found my Website here: http://www.fishingwithflies.com/MyFavoriteFliesTheConeheadCombo.htm

The picture below is how I set things up tonight for tying the One Feather Fly.  The purpose of the large white foam board (left over from a picture framing project) is to reflect light upward and underneath the fly.

[Edit: The white foam board was an experiment, and I'm not sure it made enough difference to bother with it... and after tying a few flies I think I had spots in front of my eyes because it was too bright for me looking down at an angle as I tied the fly.]

Many people place a third or even fourth light under the fly to match the light from the two lamps above the fly.  But, its hard enough to tie a fly with the front of the camera lens only  2" away from fly, so I don't bother with lights below.


One thing I forgot to mention in the prior posts is that the camera's built-in self timer is very helpful.  If I am holding any materials, the timer allows me to press the shutter button and quickly position materials, which I did in several of the pictures below.  By default, most cameras will give you a 10 second interval.

Here are the ingredients: hooks, beadheads, and one pheasant rumpfeather
with aftershaft for each fly.  Cut the main feathers in half.  Do not
cut the smaller aftershaft feather.


Tying Steps

Tie in the tip of the front half of the pheasant rump feather.

Twist the feather into a rope and wrap forward
like chenille on a woolly bugger.

Tie off the rope about 2/3 of the way up the body or when
the stem gets too thick to wrap.  Snip off the excess. 

Create a dubbing loop into which you will insert
the back half of the feather.
I use a dyna-king dubbing spinner.
Stick the back half of the feather into the loop.
To make it more dense you can fold the feather in half (which is
a standard technique I find difficult)
or insert two feather halves (as I did here)

Cut off the stem.

Spin the thread with the dubbing spinner.

Wrap the dubbing loop forward and tie off.
There will likely be some additional hook shank to cover.

Resort to direct dubbing to finish the front of the fly.
Aim the butt of the stem of the soft aftershaft feather
toward the beadhead and twist the feather onto
the thread just like you'd do with rabbit dubbing.

Wrap the dubbing forward while helping it with
the fingers of your left hand.

Stroke the fibers rearward as you wrap the dubbing
behind the beadhead.

Finish by tying off behind the bead head with a few whip knots.
I cheat by using a whipping tool.

Sunday, April 1, 2012

Set up for your point and shoot camera (for fly photos)

Part 4 of a 6 part series

In this tutorial I thought I would share some of the things I have learned about using point and shoot cameras for fly photos.  
Auto Mode

For many point and shoot users the entire idea of just "pointing and shooting" is very appealing.  It's easy and the results are quite reasonable and generally "good enough".  All you do is set the camera in its "Auto" mode and fire away.

But  there is a problem with this mode: you must give up control over many available features that will improve your photographs. To get the most out of your camera, especially for close up fly photos, you will want to use as many of the following features as you can: 

Macro
Single point or spot focusing
Flash off
Center weighted metering
EV Compensation
ISO adjustments
White balance adjustments
Image Stabilization

Beyond Auto Mode

Only the more advanced point and shoot cameras have all of these extra features.  But even the simplest cameras have most of these features.  For example, my Canon G9 and Panasonic LX5, both flagship models, have all of these features plus full separate manual controls for shutter speed and aperture.  On the other end of the spectrum, my "idiot proof" Panasonic waterproof TS2 camera has all but the center-weighted metering option... and for this camera there is a work-around that involves using the EV Compensation button instead.

To activate these additional features, most cameras have what is called a "P" mode (which stands usually for Programmed) or an "M" mode (which stands for Manual).  My waterproof Panasonic identifies this mode as "Normal Picture".  The "M" mode appears on my wife's SD-series Canon and I also remember it on my old Fuji F20. This "M" should not be confused with full manual control, often marked "M" as well, available on the most advanced cameras to allow manually and separately controlling aperture and shutter speed.

After you make the leap to "P", "M", "Normal Picture" or a similar setting, you'll need to use the camera's menu or one or more of the camera's buttons to make the following adjustments:

MACRO:  Look for the tulip icon.  On every camera in my family, there is a button on the camera body that is assigned to this feature.  The macro will allow you to focus as close to the subject as the lens is designed for.  Most macro settings work best at full wide angle.  Unfortunately, this often means the lens must be 1" or less from the subject, particularly for a small fly.  This is crazy. Though the camera will focus, the camera blocks the light.  Experiment with your particular camera. Try to find a spot in the zoom range where the fly is sufficiently large in the viewfinder but which also gives you at least 2" of working room between the fly and the lens.  This is pretty easy to do if you are photographing, say, a size 4 classic streamer.  It's more difficult if your subject is a size 18 Griffith Gnat.  For this reason, if you plan to photograph a size 18 or smaller fly, you might want to tie one on a size 12 hook.

SPOT FOCUSING:  In auto mode, many cameras have no choice but to focus on multiple points in the scene.  But for close ups you will want 1-point or spot focusing.  The focusing point is usually a small set of brackets or box shown on the LCD.  Obviously, you will want the single focusing point to be aimed at the fly and not the background.  On some advance cameras, like my Canon G9 or Panasonic LX5, this spot focus point can be moved around the screen.  I like to line it up with the hook point.  If the hook point looks sharp in the picture, the human eye and mind seems to accept that the entire fly is sharply in focus.

FLASH: Turn it off


CENTER WEIGHTED METERING:  This option may not be available on your camera.  But if it is, I would suggest using center-weighted metering.  This causes the camera to weight the light on the central subject more heavily than the light on the background when it comes to determining the "correct" exposure.

EV COMPENSATION or PLUS MINUS EXPOSURE:  This option is viewed as a pretty advanced function, but all the Panasonics and Canons in our family have it.  It is usually shown as a button on the back of the camera and the icon is a "+/-".  It allows you to manually change the exposure.  My experience is that the camera accomplishes this by changing the shutter speed.  So, even if you don't have the center-weighted metering option described in the paragraph above, you can make an exposure adjustment to your next image by using the +/- feature.  If your fly appears too dark, move the +/- scale to 1 stop on the plus side of the scale and take the picture again.  The "+" means that you are adding light.  If it is still too dark, move it 2 stops on the plus side.  This feature is especially helpful if you have a darker fly against a lighter background.  If you are shooting a light colored fly, then you might move the scale in the "-" direction to reduce the exposure.


ISO:

WHITE BALANCE: Colors look different under different light.  Ever notice how pictures taken indoors are yellowish?  A white wall might look yellow, when the lighting is from incandescent light bulbs.  And a flash may make things look bluish. White balance adjustments are available to help colors look more accurate under different lighting.  Auto white balance is the default setting in all cameras.  In most daylight situations the auto white balance does a good job.  But indoors, it struggles.  At the very least, scroll through the various white balance settings and pick one that yields colors as close as possible to how they look to your eye. The white balance choice that looks like a light bulb is often good.  Even better, if available, is a custom white balance.  Usually, with custom white balance, you point the camera at something that is supposed to be white or grey.  The camera can then make a calibration adjustment, for example so that a white wall looks white and not yellow.
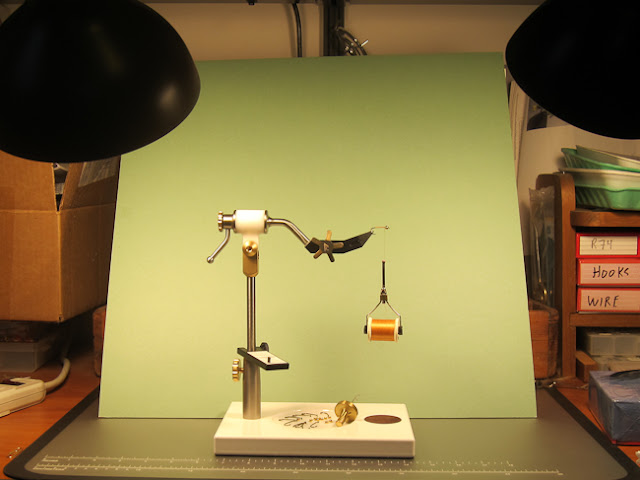

Auto White Balance on my Canon S90.  The colors are way off. 
The fly vise base should be white.

Custom White Balance.  I set the custom white balance by having the camera
calibrate white off the base of the vise.  It got it right.


IMAGE STABILIZATION:  Turn it off.  If your camera has image stabilization, this is great when hand-holding a camera in dim light.  But if using a tripod, images may actually be sharper if you turn off image stabilization.

Beyond P Mode

If you have one of the few point and shoot cameras that has full manual controls, then you have the added benefit of being able to control depth of field.  Depth of field relates to how much of the fly is in focus. A shallow depth of field means only a small "slice" of the fly is in focus.  With a larger depth of field a thicker "slice" of  the fly is in focus.

APERTURE PRIORITY: To increase your depth of field, switch to "Aperture Priority" mode.  This is usually done via a dial on top of the camera.  The dial will often show these choices: Auto, P, A, S, M.  Pick "A" to get to aperture priority.  First try shooting with the aperture set to F4.  This is often the sharpest setting.  But also try F8. This gives more depth of field, though overall it may be less sharp than F4.  On the other hand, with more of the fly in focus, the image may appear sharper with the F8 setting.


Conclusion


I know there are a lot of suggestions here.  And if you have been taking all your pictures in Auto mode, these suggestion may be a bit over the top. 

What do I think are the most important features?  I like having aperture priority on my cameras, but cameras with this feature are very few in number.  I think knowing how to use the macro mode is important.  Though this seems obvious, I know many people forget to use it and learn to live with blurry images.  A third important feature is white balance.  If you take pictures indoors under artificial light, you will need to know how to adjust your white balance if you want colors to be accurate.

It's my wish that at least one of the advanced features described in this post will work itself into your picture-taking routine.

Saturday, March 24, 2012

Set up for a desktop photo studio

Part 3 of a 6 part series


I'm going to describe a simple desktop photo studio.


Let's first talk about the background that will be seen behind the fly. If you decide to use a busy background, such as an assortment of colored thread spools stacked on dowels on one of those cool multi-stepped wooden racks, be sure that they are far enough away from the fly to be somewhat blurred in the photo.  Otherwise the background will be distracting to the viewer.

I've tried busy backgrounds, but prefer a simple approach. Colored mat board is a good choice if you have access to an art supplier. Mat board is the material that is used for mounting photographs for framing. I like to keep the mat board about 8" to 14" inches behind the fly. You'll have to experiment to find what works best for you. 


A mid-tone background is a good overall choice. I like medium shades of gray, blue, or green.  I buy my mat board online, from American Frame. A 12" x 18" piece should be plenty big enough.

Colored folders work great too. You can pick up colored folders at Staples or W.B. Mason.


Three good colors to use for a background.  Grey and green are mat board. 
The blue is a colored folder. If the grey mat shown here looks a bit off color,
then it is likely that your monitor needs calibration. 
Most monitors are too bright and have a blue color cast.

In the past, I've propped up the mat board vertically using two 12" lengths of 2x4s, one supporting the mat from the front and one from the back. Here I've used four 16 ounce cans from the kitchen (two at each corner, front and back). 


Want to simplify one step further? In the picture below, I have merely leaned the mat up at an angle against a pile of stuff at the back of the desk. The pedestal of the vise will hold it in place.  The angle of the mat actually reduces the reflection on the camera lens from my tying lights.  Plus, it's a great way to hide crap on your tying desk!  Use this system even when you are not planning to photograph your tying steps.  I find the green to be very soothing on the eyes while tying.


Don't want to buy any mat board?  With a one or two clothes pins, clip a colored folder to a piece of corregated cardboard cut from the side of a cardboard box.  All the hopper photos on my Web site were done with this green folder as the background.


For light I like two desk lamps with elbow joints. They are held to the table with C-clamps. You can see the lamp shades in the upper two corners of two of the images above. You can buy them cheaply at Staples. I use this arrangement because it is the same lighting I prefer for tying flies. If I could find higher quality desk lights than these $25 ones, I would buy them. But I have to admit, I haven't looked too hard.  The ones I have don't hold their positions very well, because I can't get the elbow joints tight enough. I sometimes use duct tape to keep the elbows from slipping.

For light bulbs, I use spiral fluorescent bulbs. They are 30 watts. The fluorescent bulbs are nice because they don't heat up. If you use incandescent bulbs, use 100 watts.


A tripod is needed to free up your hands to hold materials.  The one pictured below is made by Sunpak and is the MiniPro Plus/B.  I think the "B" must stand for "ball head", which easily allows you to move the camera around the ball joint for making adjustments.  As of this date (March, 2012) it is selling at Amazon for $20.95.


The G9 allows for a pretty good macro at about 2x zoom at 2" from the subject.  A 2" working distance or more
is needed when tying a fly.  At a 1x zoom this camera has to be too close to the fly, and it is then nearly
 impossible to get light onto the subject.  Take a few moment to do a better job than I did lining up the camera and the fly.

Available on Amazon for about $21 (as of March, 2012).


Next Post: Set up for your camera (for Web use)

Sunday, March 18, 2012

Set up for photographing step-by-steps: getting out the camera

Part 2 of a 6 part series

Just about any digital camera will work just fine for photographing flies. To get the most out of a camera it is best to (1) use the macro feature, (2) turn the flash off, and (3) use a custom WB adjustment.  Every camera I've seen has these features, though sometimes the adjustments are deep into the menus. I will explain how I use these settings in a followup blog post.


Recommendation: 

If you are in the market for a new camera, try to find one that is 12-18 months into its production cycle.  At that point in time the price is often discounted by 30-40%.  I think the best places to shop on the Internet for cameras are: Amazon, Adorama, and BHphotovideo. 

For an overall useful every-day point and shoot camera for an outdoor enthusiast, I am a fan of the current line of "tough" cameras.  I own the Panasonic TS3.  This is now a generation old, having been announced in January, 2011.  This meets the 12-18 month parameter described in the above paragraph.  My son just bought one at Amazon for $220.  Now, each of my three children has one. When they came out they were selling for $350.

Being weatherproof, I can take this camera fishing (it will take pictures underwater, too) and skiing (it will operate nicely down to 14F). It is also dustproof and shockproof. It takes videos clips and has a nice zoom range. It has a GPS for tagging your pictures, an altimeter, a compass, and a barometer. Oh, and it has a macro mode and customizable white balance, both of which are needed for good fishing fly photos.


My Old Favorite for Web Photos:

A couple of years ago I sold off my beloved Nikon Coolpix 4500's on Amazon, while it still had reasonable value. I bought the 4500 in 2002 just before this series of split-body cameras was discontinued, and used it for about 7 years.  I remember being excited about the $250 rebate that brought the price down to $750.  Today, in 2012, $750 can buy a whole lot more camera than it did back then.   In fact, if you want to purchase a used sample of this Nikon classic, I see them on Ebay often at under $100.

Arguably, the Coolpix 4500 (and earlier versions) had the best macro available in a non-dSLR camera. But the LCD was hard to see at only 1.8" in diagonal size, and the camera was mostly menu driven. The 4 megapixels made beautiful prints as large as 15" wide, and the files were certainly more than adequate for Web use.  But I never found the user interface particularly user-friendly. I like lots of buttons to directly drive the controls, and the Coolpix 4500 had very few. It also lacked RAW capability and a histogram, both of which are now major priorities for me.

Nikon Coolpix 4500, in closed position


My Current Favorite for Web photos:


My current camera of choice for Web photography is the 12mp Canon G9. The G9 is a discontinued model and is now two generations old; but, used ones are available on Ebay for around $200.  It will shoot in an easy-to-use automatic mode (the green choice on the command dial on the top plate shown below), but also has a full complement of manual control buttons, dials and wheels.

Canon G9 - lens collapses when turned off


Larger Sensor Cameras For Prints:

As good as the G9 is, for fly images that will end up as prints, a camera with a bigger sensor can do wonders. An example is the 16mp Panasonic GH2.  In the picture below I have the GH2 equiped with  30-year old Nikon 55mm macro lens. The extra detail that comes from the bigger sensor (about 4x the squared dimension of either the G9) and a dedicated macro lens is not obvious when viewed on the Web and hardly noticeable even when viewed full size on a computer monitor (about 70-90 dots per inch), but when printed at 200-300 dots per inch the difference is spectacular.

Panasonic GH2 with Nikon 55mm macro lens


Wednesday, March 14, 2012

Set up for the One Feather Fly: gather all the parts and dusting off the Web site template

Part 1 of a 6 part series

I was shocked to see that it was last May when I published a blog post about the One Feather Fly and promised to prepare step-by-step instructions for this simple fly. The months go by so quickly!  After that blog post, it was fun to receive a few emails from others who get a kick out of tying and using the simplest of flies.

Now, in March, I find myself motivated to get tying and photographing because I am all out of these little delicacies! Unfortunately I find today that I only have two remaining 5/32" gold beadheads. I like to tie in groups of 10 or 12, and this is my favorite size when added to a TMC 3761 size 8 1xl wet fly hook. I'm sure the silver ones I have will work just as well; but they just don't look as good to me. I'll pick up some gold ones tomorrow at the Orvis Store.


10 size 8 TMC3761 hooks and 5/32" gold beads from the local Orvis store.

I'm going to need some nice rump feathers (one per fly) from my Ring Neck Pheasant skin. I'm sure I will find some decent feathers, but the skin has been pretty picked over. The closer the feather looks like blood marabou the better.

Rump feathers are on the left (and this skin has been used a lot)!  Back feathers are on the right.

I found that the last set of step-by-step instructions that I prepared was about four years ago when I used it for the Conehead Combo. I like the template/format I used back then, and will use it for my upcoming step-by-step instructions. Unfortunately and unpredictably a few of the old pages on my Web site sometimes take more time to open in Internet Explorer than I like.  I don't have any idea how they open in other browsers like Firefox or Safari. I am still using Microsoft's Frontpage 2003 for my Website and it is very old software.  This blog is done through Blogger (which is Google) so the software behind the scenes is taken care of automatically and continuously by Google.  The blog pages open nice and fast.